How to Convert Files to a PDF and Vice Versa

To convert files to a PDF with PDFChef by Movavi, follow these steps:

  1. Download and run PDFChef on your computer.
  2. Click Convert and select your files. View all formats
  3. Click Convert and save the PDF files to your computer.

By clicking the download button, you're downloading a trial version of the program.*

Converting PDF files on Windows and Mac

Edited by Ben Jacklin
12 840

There are plenty of options available for changing a regular file to a PDF. Part of the tools that you can use includes desktop apps for Windows and Mac. There are also online tools that come as free or paid versions.

If you are looking to change the files you have into a PDF, then you will need a special app. There are several apps on the market, and in this post, we will consider one of the best options. We will also show you how to change the files using a desktop program and other tools available.

How to convert files to PDF using a desktop program

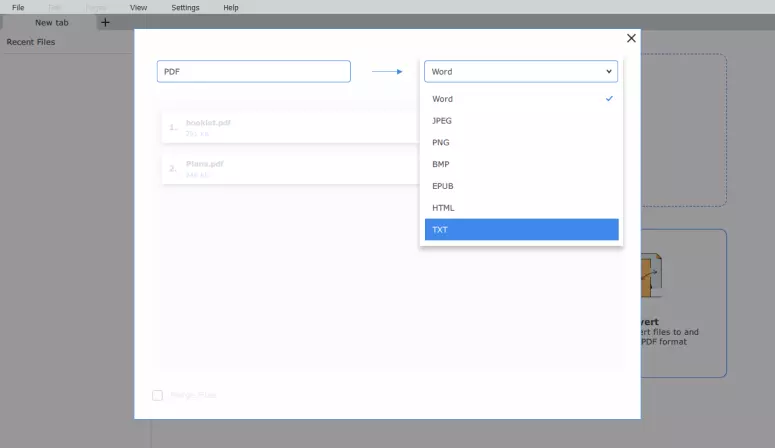
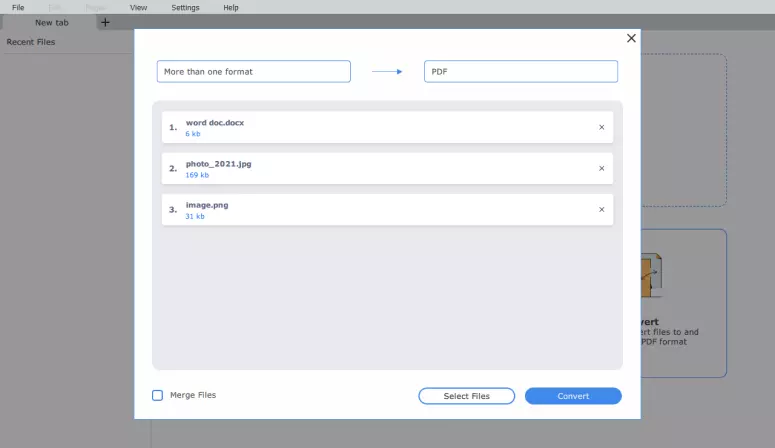
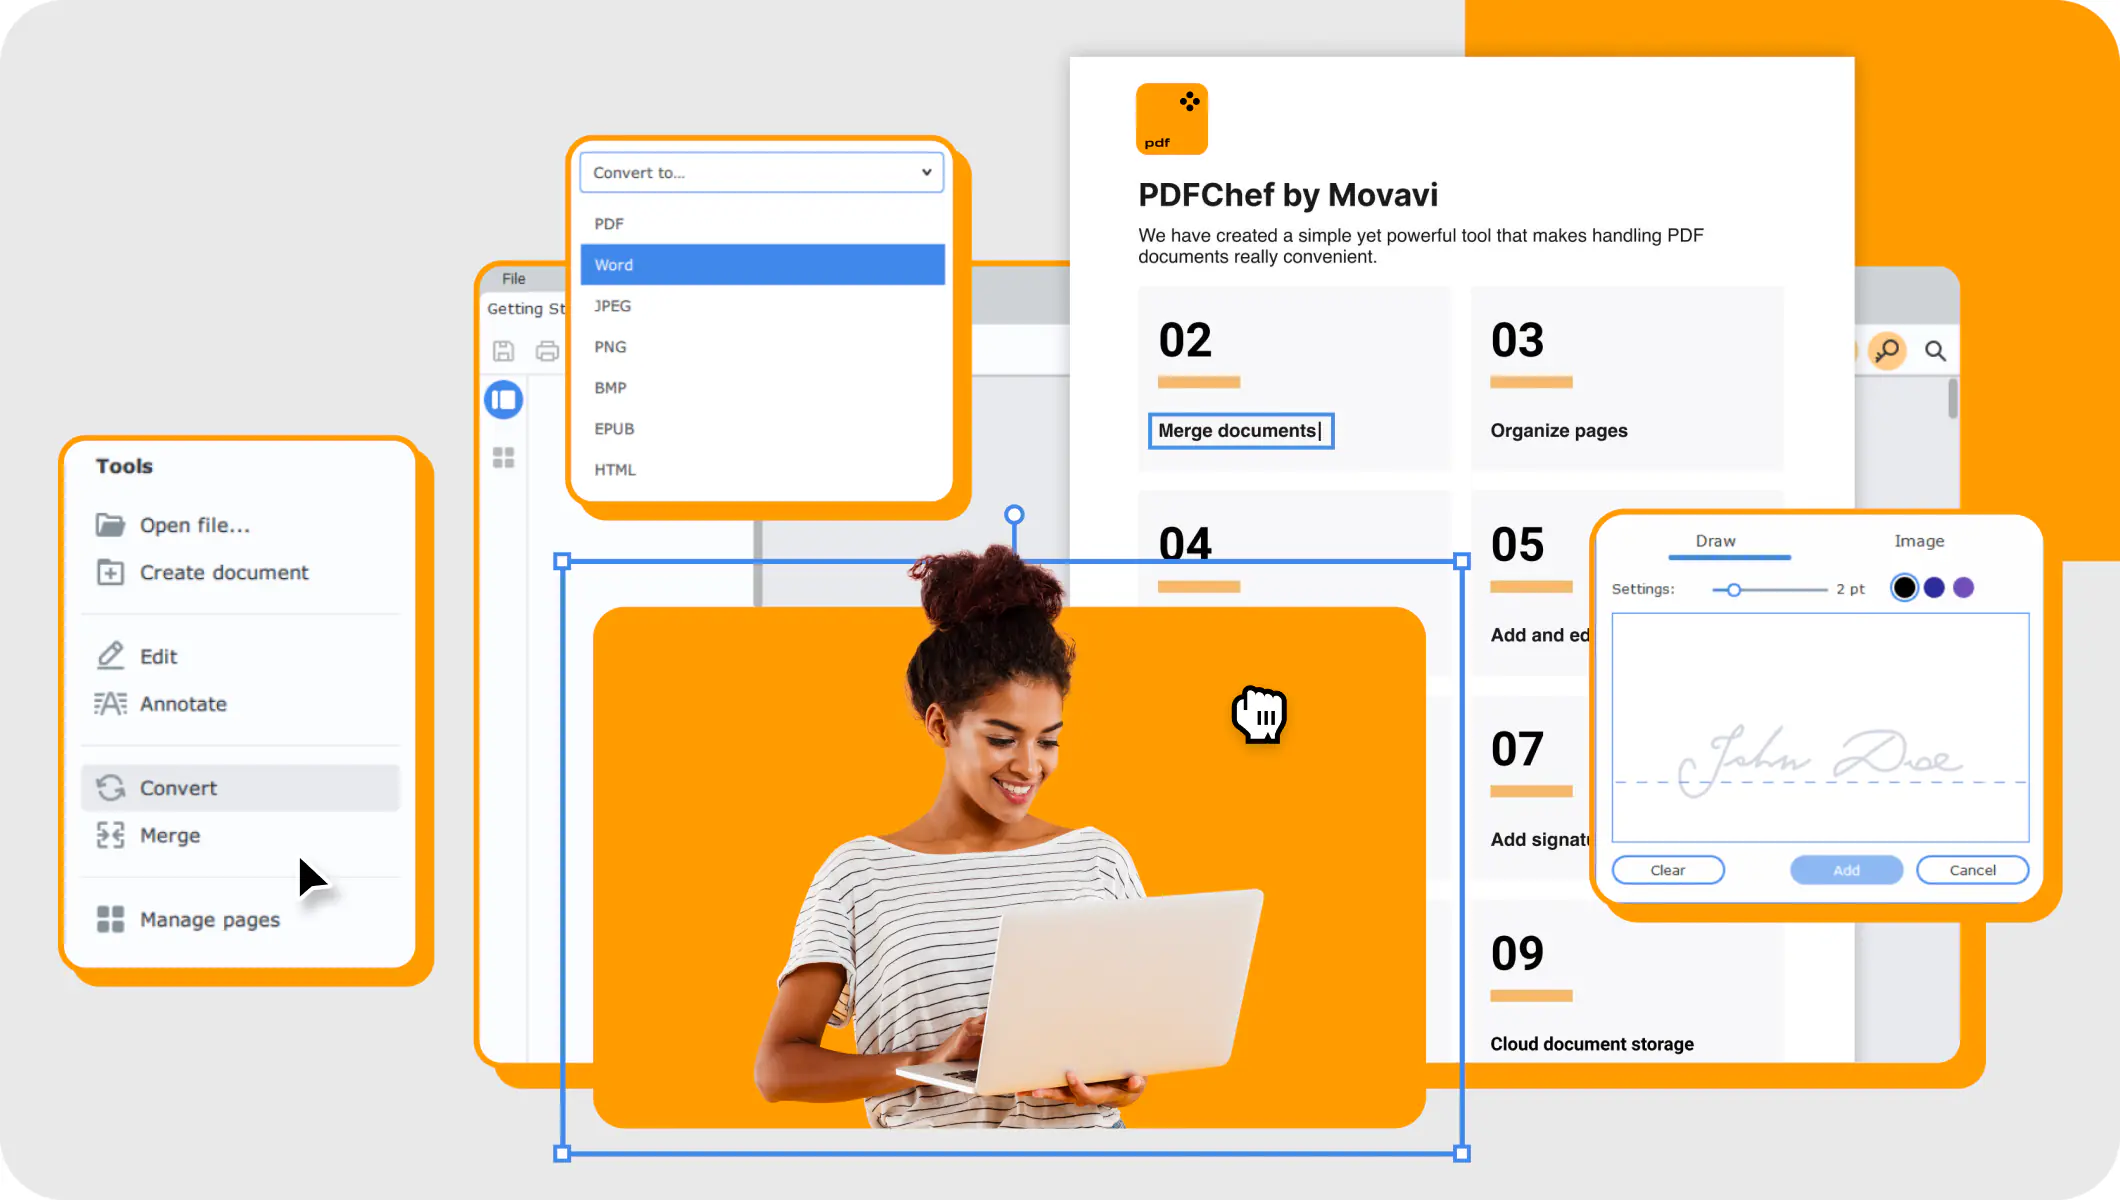
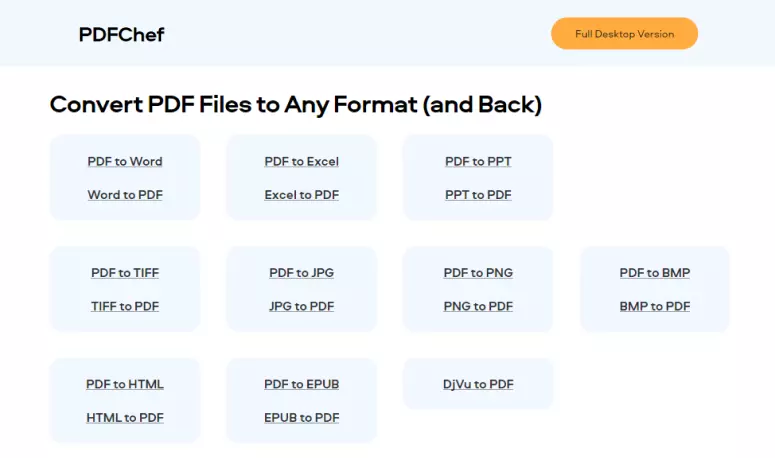
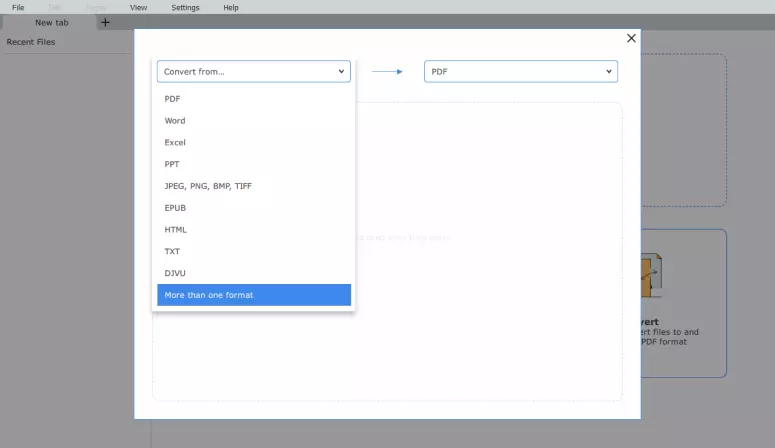
So, you are looking for how to change your Word documents and similar formats to a PDF format? Well, in this section, we will show you how to do this with a desktop program – PDFChef by Movavi. This is a highly recommended way of getting things done. Not only does it change the format from Word, but it can also work to help you convert Excel, Epub, PNG, PPT, JPG formats with as little fuss as possible.

This tool is great and will work with different documents even if the files are bigger than usual. Apart from helping you to convert plenty of pages at a go, it can also be used to batch-convert the files in different formats.

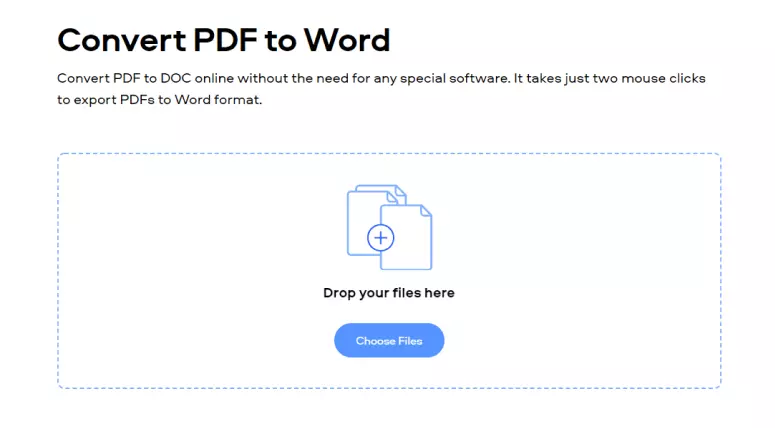
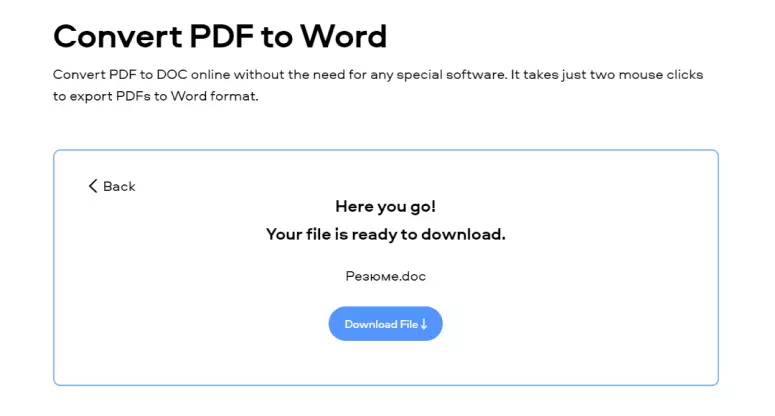
With all of these advantages in mind, let's see the step-by-step process of changing the file format.

Step 1. Download and install PDFChef by Movavi

The first thing that you need to do is to get the program, after all, if you don't have it on your computer, there is no way you can use it. So, download the program, double-click the installation file and follow the on-screen instructions.

Step 2. Add your files

After installing the program, run the program and choose the Convert tool in the lower-right corner of the program window.

Choose the "Convert" tool to add a file and convert the PDF to the desired format

After clicking that, the dialog box will pop up, and you should choose the input and output formats. There are numerous formats supported by the program ranging from Epub, TXT, Word, HTML, DJVU, JPEG, PNG, BMP, and more.

If you want to batch-convert files to PDF, choose the More than one format option. Then click Select Files to add the documents to the program.

Choose the desired file format to convert your PDF into it

Step 3. Convert the files to PDF and save them to your computer

Click Convert in the bottom right corner of the dialog box. The program will convert the files to PDF and save them to your computer.

Hit the "Convert" button to convert the file to PDF

How to convert PDFs to different file formats

We have considered how to change the files to PDF. But sometimes, you might want to change the files from PDFs to other formats. Is this possible? Yes, it is. With PDFChef, you can do this as easily as changing from different file formats to PDF.

Here is a step-by-step guide on how to change the format.

Hit the "Convert" button to convert the PDF file

Step 1. Download and install PDFChef by Movavi

To get started, you need to have the software installed on your computer. Download the installation file, click on it to begin the installation, and follow any instructions that pop off. It is pretty easy and straightforward.

Step 2. Add your files

This process is similar to changing from different file formats to PDF. Therefore, after launching the program, click on Convert in the lower right-hand corner of the program window.

Choose the "Convert" tool to add a file and convert the PDF to the desired format

To add the PDF files you want to convert to a different format, click Select Files. The program will automatically recognize the file format as PDF. When you’ve added your files, choose the desired output format.

Choose the desired file format to convert your PDF into it

Step 3. Convert the files

After identifying and choosing the PDF files you want to change, click the Convert button and select the folder you want to save the files you convert. The program will change the format of the files and save them to your computer.

Hit the "Convert" button to convert the PDF file

Formats available for conversion with PDFChef

CONVERT TO PDF

CONVERT FROM PDF

Documents and Presentations:

Word, Excel, PowerPoint, text

PDF to Word, PDF to TXT

Images:

JPEG, PNG, BMP

PDF to Image (JPEG, PNG, BMP)

E-books:

Epub, DjVu

PDF to Epub

Web Pages:

HTML

PDF to HTML

How to convert files to PDF format online

There are different reasons why you might not want to download the software to your computer. Perhaps you don't have enough storage space, or you’re not using your computer but that of someone else. Whatever the case may be, the good news is that you can change files from other formats to PDF online. Furthermore, many of these converters are free to use and will not harm your computer.

If you need to convert files quickly, try using our free PDFChef web app.

Step 1. Go to the website

Go to the official website of the program and choose the converter that you want to use.
Proceed to the online PDF converter

Online PDF Converter

Step 2. Upload your file

After selecting the converter you want to use, upload the PDF file to the converter. This is easy to do: select Choose Files and locate your file. Or you can simply drag and drop the file from the folder into the workspace. This will automatically upload the file to the server.

How to convert files from and to PDF online with PDFChef

Step 3. Convert and download the file

Once you’ve uploaded the file, the converter will automatically convert it to the format you want. It will notify you when that is done. After this, click Download File to save the converted file to your computer.

That's all there is to it! Now you know how to convert to PDF from different file formats.

Download the converted file

How to convert a file to PDF for free on a Windows PC

In this section, we will discuss how you can change your documents into a PDF for free. You can do this quickly on your Windows computer. With this option, you don't even need to pay for anything at all. If you follow the instructions provided in this section, you would be able to do it quickly and correctly.

Here is a step-by-step guide on how you can convert your files.

Step 1. Open the file you want to convert

The first thing to do is to open the file. Therefore, locate the file on your computer and double-click on it to open the file.

If you are converting photos to a PDF, you can also do this. Instead of opening each photo you want to change, just select it. You can use this method to change multiple pictures. Adding multiple photos to a PDF file is easy. To do that, select each photo and as you click, press the Ctrl button. This will allow you to choose multiple files at a go. After you have selected the pictures, right-click any of the selected pictures. When you right-click, a list of options will come up, and you should choose Print in this menu. Then you can move to the next step.

If you need to change an HTML file to a PDF, you can also do it right from the computer. Open the HTML file in Notepad. Right-click the HTML file and choose the Edit option from the drop-down menu.

There are loads of other formats that you can change. Note that the following are the only types of files that you can convert using this method: TXT files, Microsoft Office documents (like those from Word, Excel, Note, and others), photos in JPG, PNG, and BMP formats, XPS files.

Other files will not be converted.

Step 2. Open the Print menu

The second step is to open the Print menu. To do this quickly without having to go through drop-down menus, just press the Ctrl+P buttons together.

If you'd rather take the long path, or if the shortcut does not work, you can click on File, then click Print from the drop-down menu.

You might be concerned that you don't have any printer attached to your computer. You are not going to print anything, and this is merely the process required to change the file.

Step 3. Select your current printer

Remember that you aren't printing anything. Choose the current printer's name. This name is located at the top of the menu just below the Printer heading. When you choose the printer, a drop-down menu will appear.

This step is only necessary for all formats other than the text or XPS document. If you are changing a text or XPS document, you can skip this step.

Step 4. Specify the settings

After selecting your current printer, click the Microsoft Print to PDF option. This option is visible in the drop-down menu. When you click on this, your system's Print to PDF function is chosen as to how the computer prints the file. Remember, though, that you are not printing anything.

Those who want to convert a text file or XPS file can go directly to the Microsoft Print to PDF in the Select Printer menu.

The next step is to click on Print. This option is available at the base of the menu. Exceptions are when you are using a Microsoft Office program like Excel or Word. In such cases, the Print option will appear at the top of the menu. After clicking on Print, a File Explorer window will appear.

Step 5. Choose the file name and destination folder

Before you can save the file on your computer, you need to change its name. Therefore, in the File name section, type the name for your PDF document.

One tip that can help you keep track of the document is to name it the same as the original document and save it in the same folder.

Next, select where you want to save the file. The left side of the window has the option of where you want to store the PDF.

Step 6. Save the file

After choosing the name of the file and the location to be saved in, you can now save the document. Find the Save button on the base of the window.

As you can see, it is pretty easy to convert a file to PDF using a Windows computer and without downloading any additional software or Internet connection.

How to convert a file to PDF for free on a Mac

Working with PDFs, whether on Mac or Windows, has a lot of benefits. It is a way of sharing files online or through email. However, many people have noted that one of the main disadvantages of working with these PDF files is that it seems hard to convert a file to a PDF on a Mac, especially when you are using other formats. Many users have downloaded a PDF converter for their Mac and search for how to convert the files.

If you need to convert files to a PDF on your Mac, try using a built-in app called Preview. It is simple to use. The first step is to know the file formats that you can change into PDF. Some of these include TIFF, JPG, PNG, BMP, and similar photo files. The good thing about Preview is that it is not only simple to use but is also free of charge.

This section covers a step-by-step process of changing your files to PDFs with Preview. Here are the simple instructions to assist you.

Step 1. Choose the file

Go to the file location and click on the file to choose it.

If you are trying to change photos, you can select several photos simultaneously by clicking on each photo and holding down the Command key.

Step 2. Specify the settings

After locating where the file is and clicking on it, click on the File icon on the upper-left corner of your screen. After clicking that, you should see a drop-down menu.

After the drop-down menu has appeared, locate the Open with option. After locating that, select it and wait for the menu to appear. Find the Preview option. The number of options here will depend on the types of programs that you have that can open the selected files. Click on Preview and the selected files will open in this app.

After opening the file with Preview, the next thing is to click on File again. When you click on it, a drop-down menu will show again. The drop-down menu will list Export as PDF as one of the options you can select. When you click on this, a Name text box will appear. Type the name you want to save the file with.

Step 3. Choose the destination folder and save the file

Next, you need to choose where you want to save the converted files. Click the Where box and choose the folder that you want the PDF to be saved to.

After typing the name and selecting the folder, the converted file should be saved to, click on Save. This is what will convert the file for you. Once clicked, it will be saved in your preferred location.

Was the article helpful?

Have questions?

Have questions?

If you can’t find the answer to your question, please feel free to contact our Support Team.

Join for how-to guides, speсial offers, and app tips!